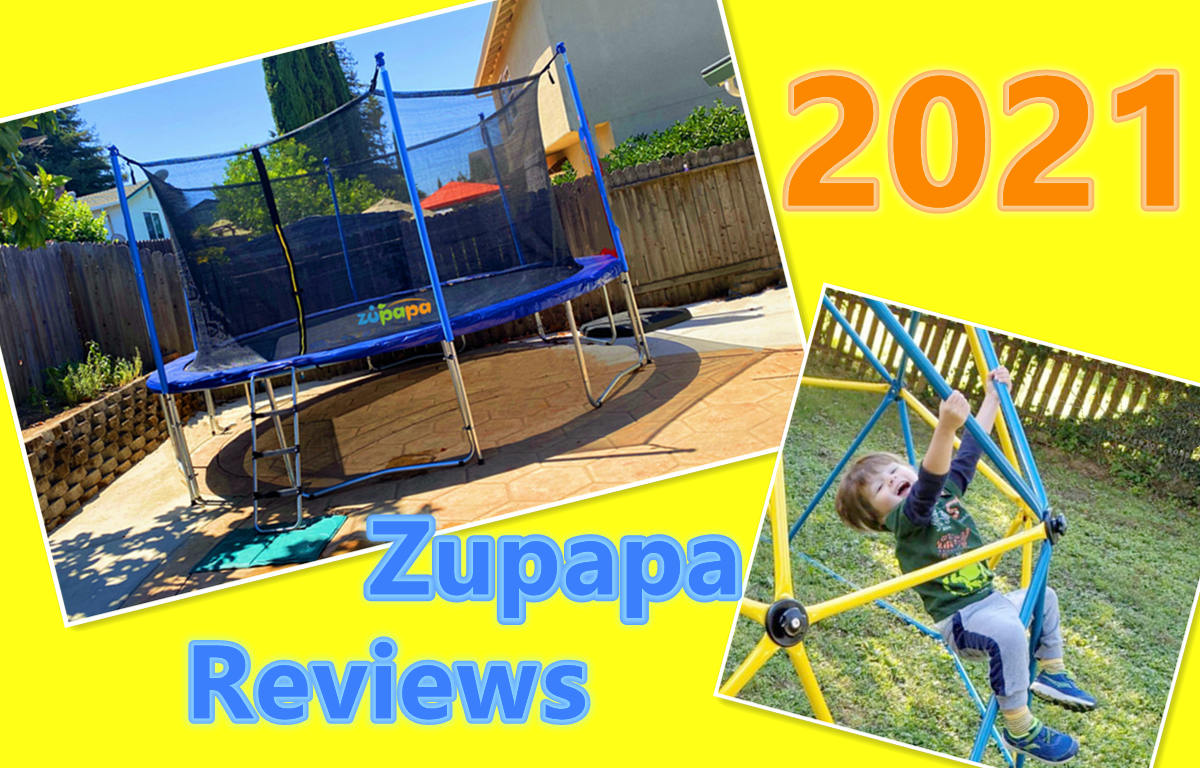
When you buy a 10ft trampoline with a net, you need to do understand how much space a 10ft trampoline with a net will take up.
In order to safely accommodate a 10ft trampoline with a net in your yard, you need to leave enough space for the trampoline and safety margin. Therefore, you need to consider the following diameters. Allows an area of 13 feet. Please make sure that your backyard can reserve enough space to install this 10ft trampoline with net.
Then, read the trampoline manual provided by Zupapa to understand the main steps of installing a trampoline, and refer to these steps for installation.
Know these things before installing trampolines, trampoline assembly, trampoline with net, trampoline accessories, trampoline ladder, trampoline springs, trampoline mat, trampoline pad, trampoline stakes.

The main steps to assemble a 10ft trampoline with net are as follows,
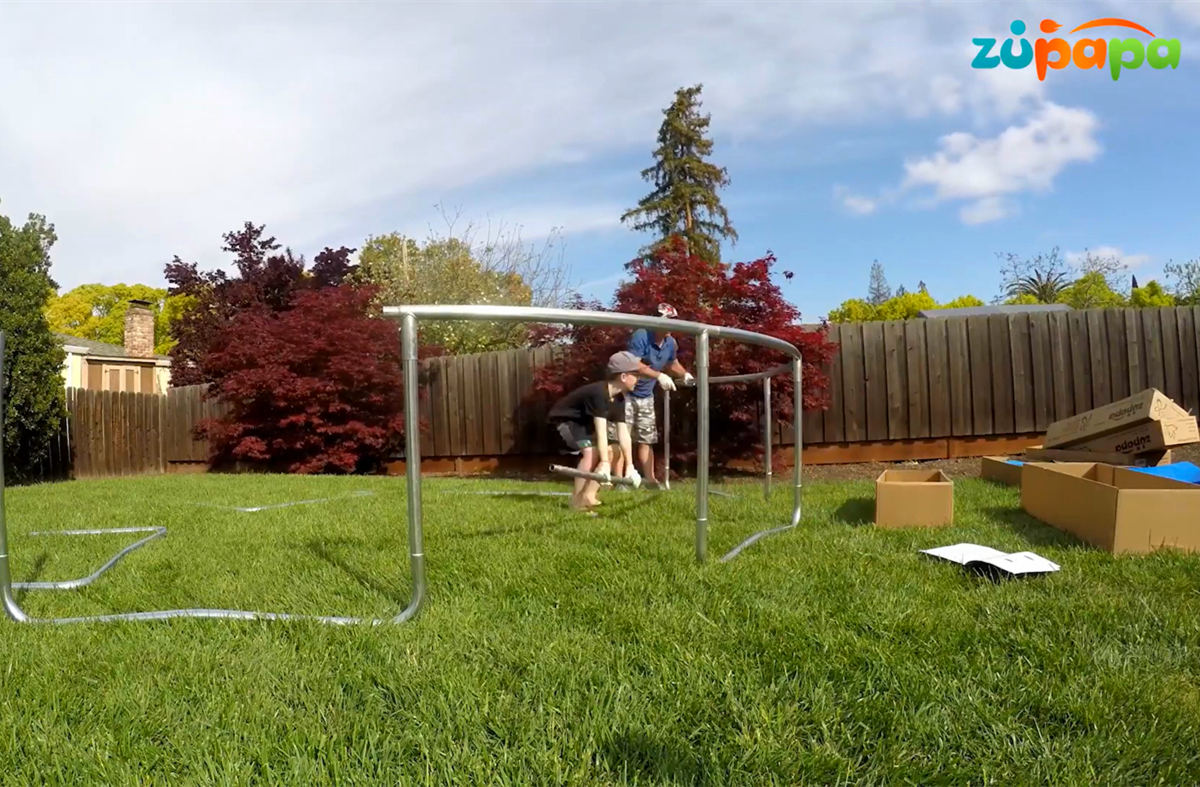
(1) Fame layout and connect frame parts
The goal of this step is to lay out the overall framework. All parts with the same part number are interchangeable, and there is no ‘right’ or ‘left’ orientation.
If you want to connect the frame parts, just slide the smaller pipe section at one end into the adjacent pipe section.
The components involved in this step include: #5 leg base.
(2) Install the support components
The goal of this step is to install some supporting components.
The components involved in this step include: #5 leg base, #6 vertical leg extension.
You need to slide all vertical leg extensions (REF-#6) onto the leg base (REF-#5).
(3) Install the upper rail assembly
The goal of this step is to install the upper rail assembly.
The components involved in this step include: #3 top rail with outrigger socket, #4 top rail.
There are a few things to pay attention to in this step,
- This step requires two people to assemble the trampoline. Among them, a person lifts the support assembly from step 2 to the standing (vertical) position, and inserts one of the sockets of the top rail with socket (#3) into the vertical leg extension of the support assembly. Another person holds the other end and inserts the part into another support assembly.
- You should now have 2 support components fixed together by a top rail with socket.
- Now, by inserting the top rails (REF-#4) into the slots, install them in the gap between the vertical leg extensions (REF-#6) as shown in the picture.

(4) Connect the jumping pad to the frame through the spring
The goal of this step is to install the spring.
The components involved in this step include: #1 trampoline stitched with V-rings, #11 galvanized spring, #12 spring loading tool.
The things you need to pay attention to are as follows:
- Use the attached special spring-loaded tool (reference -#12).
- Make sure that all springs (reference-11) hooks face down.
- All warning labels must face up.
- The spring hook must be firmly pushed into the frame hole.
- Keep the spring dry, because the wet spring is very slippery.
- Wear heavy work gloves to protect your hands and avoid pinching your fingers.
- Please distribute the spring tension evenly.
- Please make the spring hook face the V-ring and hole.

(5) The frame is filled with components
The goal of this step is to install the components to the frame.
The components involved in this step include: #2 frame filling.
You need to pay attention to the following,
- Do not use the trampoline without connecting the frame cushion.
- Before each use, please tighten the frame gasket correctly.
- If a spring or v-ring is damaged or missing, do not use the trampoline.
- Please make sure that the frame gasket covers all metal parts.
- Tie the webbing on the underside of the frame pad to the frame.
- All the black webbing stitched inside are tied to the steel ‘V’ ring with padding.
- Connect the hook of the elastic band to the V-shaped ring surrounding the outer side of the top longitudinal beam frameur.

(6) Assemble the net and pole
The goal of this step is to install the net and poles.
The components involved in this step include: #7 steel net pole with foam pad, #8 steel lower net pole, #9 safety net, #10 clamp set, #15 trampoline lawn pile, #13 steel ladder.
You need to do the following:
- Slide the upper pole onto the lower pole. Repeat the above steps with the remaining rods.
- As shown in the picture, put the safety net neatly on the trampoline, ready to proceed to the next step.
- Slide the electric pole with foam into the safety shell mesh pole sheath in turn.
- Repeat the above steps until all poles are firmly sheathed.
- Transport the collected nets/poles (#7 and #8) to the selected entrance location on the trampoline.
- Designate at least one person to hold the gathered grid/rod. Place the entrance pole on one leg and secure it in place.
- Clamp the lower rod firmly to the upper end of the trampoline leg. Then tighten the quick clamp by turning the bolt.
- When working in a clockwise direction, the electric pole uses both legs alternately until it reaches the entrance area. As shown in the picture, loosen the safety shell net hook.
- Connect the hook to the nearest triangle ring. Do not connect to the spring.
- Finish sliding fasteners and hooks at the entrance. Before starting the collection, the responsible adult supervisor must recheck to ensure that the sliding fasteners are locked and all hooks are firmly connected.
- Insert the lawn stake into the lawn
Your trampoline has been assembled.